Aura Nails Guide: Radiate with Colorful Manicures
Contents
hide
What Are Aura Nails?
Aura nails embody the idea of an energy field around a person. They use color gradients to create a glowing, ombre effect on the nails. This nail art draws from the belief that auras represent our vibes.
The Concept and Inspiration Behind Aura Nails
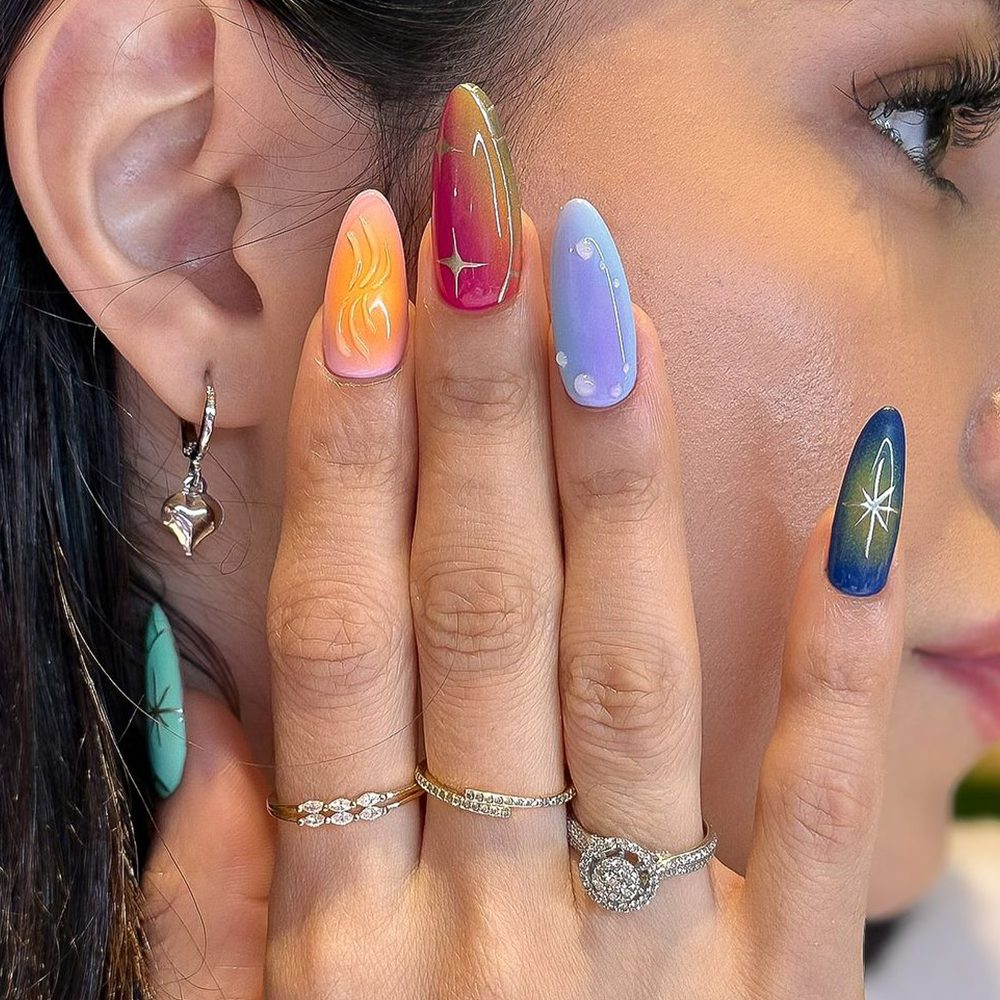
Inspired by the ’90s, aura nails are making a comeback. They mimic the look of an actual aura, which is said to change colors based on emotions. Celebrity manicurists and nail enthusiasts alike love the airbrushed, gradient style. The concept unites beauty with the mystique of auras, where each color conveys different feelings. Aura nails can express anything from joy to adventure, with hues like vibrant purples and energetic oranges. The aim is to create nails that seem to radiate light and energy, just like a true aura.
Preparing Your Nails for Aura Art
Before diving into the colors and techniques of aura nails, proper preparation is key. Begin by shaping your nails. Choose a shape that complements your fingers and reflects your personal style. Round or square tips, both work well for aura nails.
Nail Shaping and Base Coat Application
Starting with clean, dry nails is important. Use a nail file to achieve the desired shape. Be gentle to avoid splitting the nail. Push back the cuticles gently for a clean canvas. Apply a thin base coat next. Let it dry fully before moving on to coloring. A good base coat helps the polish stick better and last longer. It also protects your natural nails from stains.
Choosing Colors for Your Aura Nails
When creating aura nails, the color choices are vital. They set the mood and reflect your personal energy. Colors should radiate from your nails as if emanating an aura’s glow. Here’s how to select the right ones.
Picking the Right Shades to Reflect Your Mood
To pick the perfect shades for your aura nails, think about the emotions you want to convey. Each color can mirror a different sentiment or vibe. For example, purples often suggest perception and empathy, while oranges are synonymous with excitement and adventure.
- Peaceful blue tones: Choose these if you want to evoke calmness and serenity.
- Vibrant red hues: They signal confidence and are a perfect match for bold personalities.
- Earthy greens: Pick these for a grounded, balanced feel, representing harmony and growth.
- Sunny yellows: Opt for yellow to express joy, happiness, and optimism.
Remember the significance of gradients in aura nails. Blending similar colors creates a subtle effect, while contrasting hues lend dynamism to your design. Practice blending techniques to achieve the perfect transition from one color to another. Use tools like sponges or brushes to dab and mix the polishes on your nails. Patience is key, as layering thin coats will yield the best ombre effect.
Choose your colors based on your current mood or the aura you wish to channel. By doing so, your manicure will be more than just a style statement; it will be a personal reflection of your inner self.
Step-by-Step Tutorial for Creating Aura Nails
To dive into the aura nail trend, follow this simple guide. It ensures your nails get that celestial glow.
Tips and Techniques for Perfect Gradient Effects
For stellar aura nails, mastering the gradient is key. Here’s how you achieve that dreamy effect:
- Start with a sponge: Use a small makeup sponge to apply your color. It helps create a soft, airbrushed look.
- Focus on the center: Begin by applying your chosen color in the center of your nail. This simulates the aura’s focal point.
- Layer gradually: Build opacity in the middle by adding layers. Let each dry before applying the next.
- Blend the edges: As you move outwards, the color should fade. Use a clean part of the sponge to blur the boundaries.
- Add secondary hues: For depth, introduce a second color. Apply it over the first, but keep it central. Blend as before.
- Cure if needed: If you’re using gel polish, cure between layers. It will set the gradient firmly in place.
- Top it off: Finish with a glossy or matte top coat. It seals in the design and adds shine or a chic flat finish.
Acknowledge that practice makes perfect with aura nails. Each attempt will improve your gradient blending skills. Share your designs and inspire others with your very own aura glow. Remember to keep the keyword ‘how to do aura nails’ in mind as you explore this popular trend. Happy painting!
Maintaining the Radiance of Your Aura Manicure
Achieving a perfect aura nail design is just the first step. Keeping that design fresh and bright over time is key. Here are some tips to maintain the radiance of your aura manicure.
Top Coats and Nail Care for Longevity
A quality top coat is vital for longevity. It seals your design and protects it from chips. Apply a high-shine top coat for a glossy look, or choose a matte finish for a modern touch. For gel polish users, curing the top coat is important. It locks in the color and prevents peeling.
Regular maintenance is essential for keeping aura nails looking great. Avoid using your nails as tools to prevent breakage. Moisturize your cuticles daily with oil to maintain healthy nails. Wear gloves during chores to shield your manicure from harsh chemicals.
To extend the life of your manicure, touch up chips as soon as they happen. A thin brush can help you apply polish precisely. If the edges fade, blend the color back in with a sponge or brush. Remember to add another layer of top coat after touch-ups to seal the edges again.
Remember these simple steps to keep your aura nails vibrant and long-lasting. Regular care and attention will ensure your manicure keeps its celestial glow.
Additional Nail Art Techniques for Aura Nails
To make your aura nails stand out even more, consider adding some intricate nail art techniques. With a few embellishments, you can elevate your manicure to a new level of creativity.
Incorporating Stars and Other Patterns
Stars and other patterns can add a magical touch to your aura nails. Here’s a simple way to incorporate them:
- Start with a dotting tool: Use a dotting tool or the tip of a bobby pin to create small stars.
- Choose a contrasting polish: Pick a white or metallic polish to ensure the stars stand out against the ombre background.
- Apply gently: Dip the tool into the polish and gently press onto the nail to form a star shape.
- Vary the patterns: Consider adding small dots to represent smaller stars or constellations.
Experiment with different patterns such as moons, planets, or even simple geometric shapes. Use a thin brush for precise lines and curves. Remember to seal your design with a top coat for durability. With practice, you’ll be able to add beautiful designs to your aura nails in no time.
Aura Nail Variations and Ideas
One of the joys of aura nails lies in their versatility. With the basic technique mastered, it’s easy to play with colors and designs. Here are some creative ideas to shake up the classic aura nail look.
Creative Twists on the Classic Aura Nail Design
Experimenting with different color palettes can give your aura nails a fresh twist. Try these creative ideas:
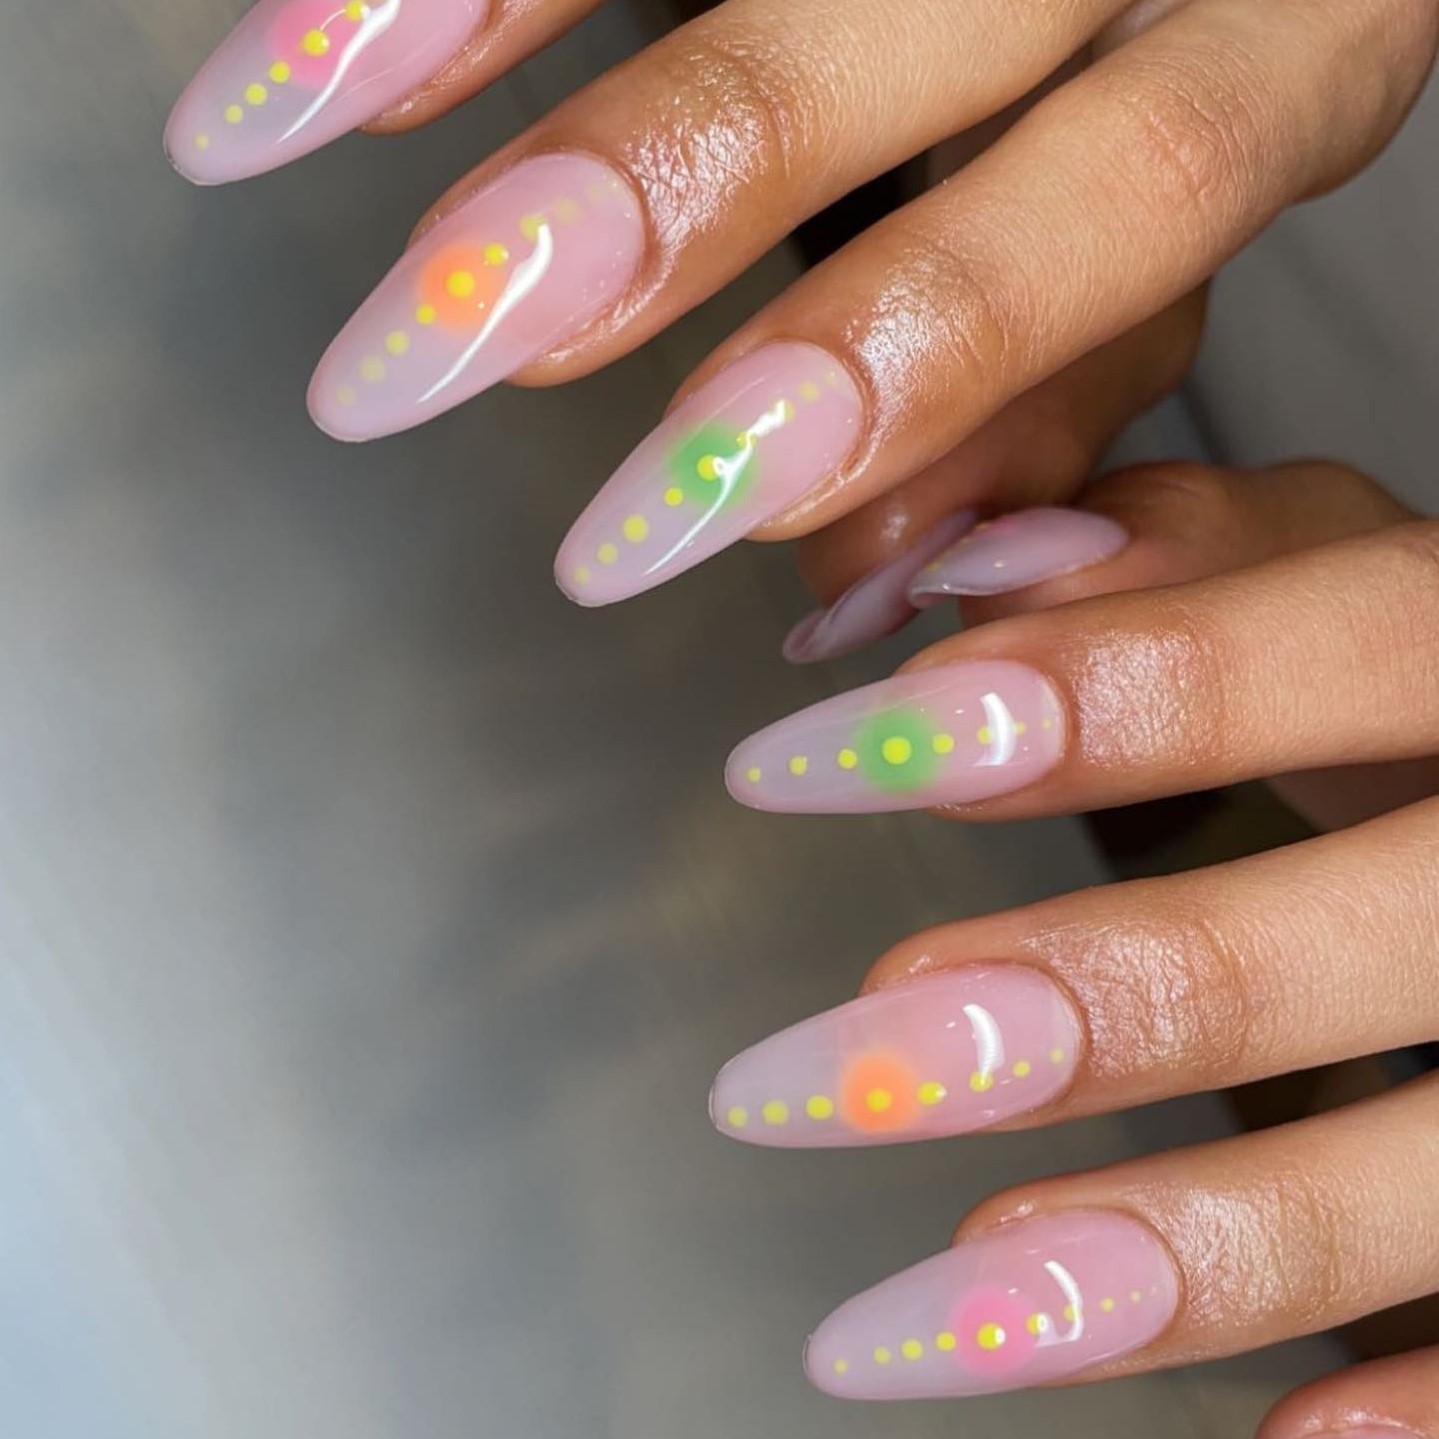
- Neon brights: Make a bold statement with electric pinks or fluorescent greens.
- Pastel blends: For a softer look, choose pastel shades that blend seamlessly.
- Deep galaxy colors: Use dark blues and purples with specks of white for a cosmic effect.
- Metallic edges: Add a touch of gold or silver to the tips for a chic border.
Incorporating unique elements like glitter or foil can add another layer of interest. Here’s how you can do that:
- Glitter gradients: Sprinkle glitter over the wet base to catch the light.
- Foil accents: Apply small foil pieces for a mirrored finish.
Layering translucent shades can create a 3D aura effect. Stack different opacities for depth and shine. Remember to select colors that reflect your mood or style. The right combination can turn your nails into a personal statement.
Play with the placement of the ombre effect. Consider reversing the gradient direction or focusing it on one edge. This makes your manicure stand out even more. Share your unique takes on aura nails and inspire others with your creativity.
Conclusion: Mastering Aura Nails
Creating stunning aura nails is an exciting way to express artistic flair. With the right tools and techniques, anyone can achieve this trendy look.
Simple Steps Lead to Stunning Results
To summarize, aura nails require minimal materials: a base coat, nail polish in gradient colors, and a top coat. Start with a clean canvas. Trim and file nails for a smooth surface. Next, apply a base coat to protect the nails. After that, select two or three complementary shades to create the aura effect.
Using a makeup sponge, dab on the colors in a gradient fashion. This technique creates a blending effect that mimics the soft glow of an aura. Transitioning between shades smoothly is key. After applying the polish, allow it to dry before adding a top coat for a glossy finish. This final step not only seals the design but also enhances the overall look.
Experimentation Yields Unique Styles
Additionally, experimenting with different colors and patterns can lead to truly unique creations. Whether opting for pastels or bold hues, the possibilities are endless. Adding glitter or embellishments can elevate the design further, making it suitable for any occasion.
Incorporating personal style is essential. Every individual can adjust the technique to fit their aesthetic preferences.
Final Thoughts
Aura nails offer a playful way to embrace creativity. The process is simple yet rewarding. With practice, anyone can master this art form and develop a signature style. Ultimately, aura nails not only enhance personal style but also encourage self-expression. So, gather the materials and start experimenting. The world of nail art awaits, and the vibrant charm of aura nails is just a brush stroke away.