
Mastering the Ombre Nail Effect: A Step-by-Step Guide
Contents
hide
Introduction to Ombre Nails
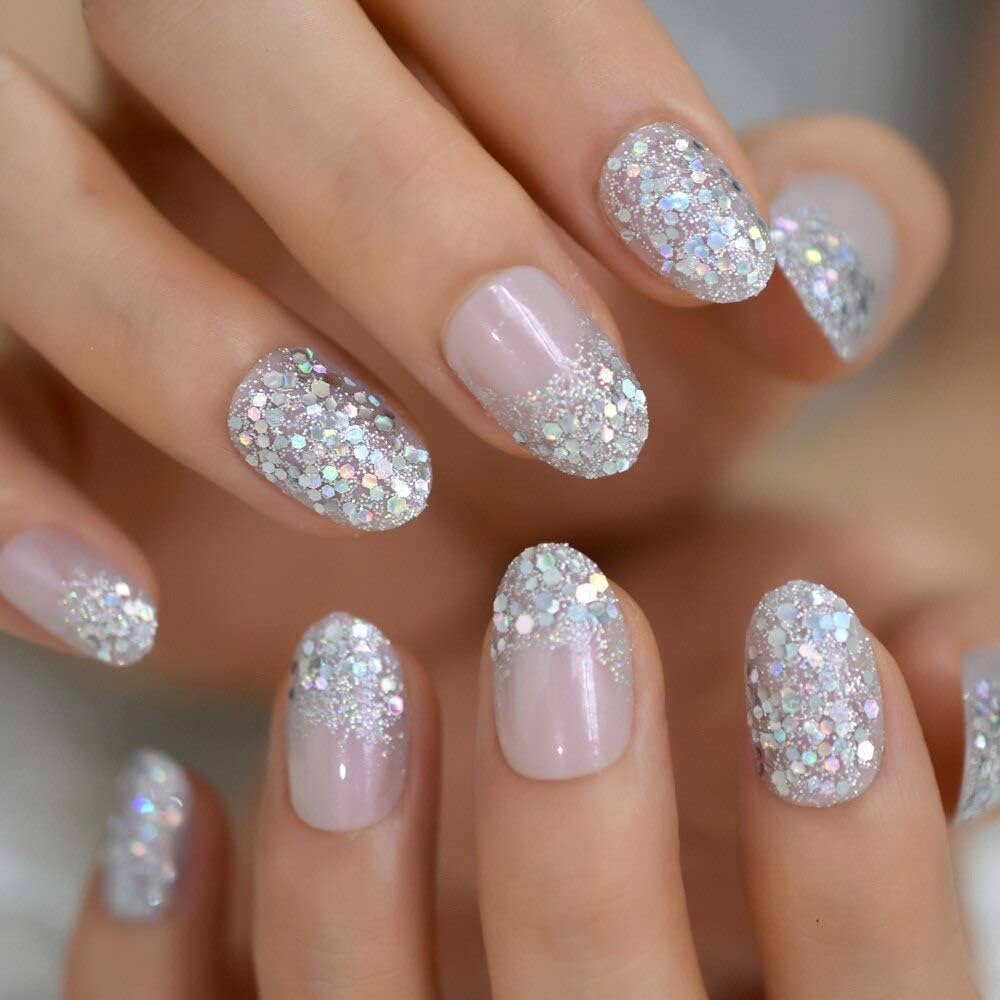
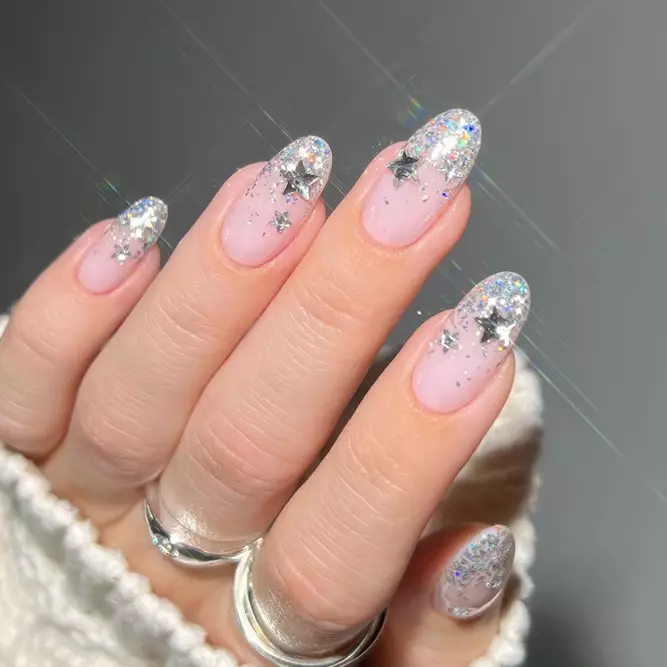
Ombre nails are a stunning nail art trend with a seamless color transition. From subtle to bold, the gradient effect is achieved by blending two or more shades. The ombre technique can vary, offering a unique look each time. Perfect for all occasions, ombre nails add a touch of elegance to your style.
To create this look, you’ll need the right tools and a bit of patience. Learn how to ombre nails with this step-by-step guide. From choosing colors to applying a topcoat, we’ve got tips to help you master the ombre effect at home. Get ready to show off your beautiful ombre nails!
Essential Tools and Materials for Ombre Nails
To start your ombre nail journey, you need the right tools and materials. Gather these essentials:
- Basecoat: A quality basecoat prepares nails and helps color stick. Choose one that suits your nail type.
- Semi-opaque or translucent gel polishes: As suggested by the pros, these types of gel colors blend well for the ombre effect. Look for pastels or shades with a sheer label like ‘S’ or two stars.
- Art Clear Gel: This clear gel polish blends your ombre colors seamlessly.
- Liner Brush: A liner brush helps apply the clear gel accurately along the smile line.
- Tap Brush: A tap brush, preferably with firm goat hairs, is perfect for blending the colors vertically.
- Topcoat: Opt for a thick topcoat, which fills any nail dents and gives a smooth, ultra-shiny appearance.
- LED Lamp: Curing your gel polish properly is crucial for lasting wear.
- Lint-Free Wipes and Alcohol: For cleaning brushes and removing any uncured gel.
Ensure you have these items before starting, and remember, patience and practice are key to achieving a beautiful ombre nail design.
Selecting the Perfect Ombre Colors
Choosing the right colors is essential for stunning ombre nails. Colors must blend well together. Generally, semi-opaque or translucent colors are best for creating smooth gradients. Pastel shades often work well. However, for a bold look, you might choose brighter or darker colors. Remember, the transition should be seamless.
- Start with Pastels: Pastels are ideal for a soft ombre look. They blend easily and are perfect for beginners.
- Semi-Opacity is Key: Look for gel polishes labeled as sheer or semi-opaque. These allow for the colors to merge without harsh lines.
- Gradient Whites: For a white ombre, use a ‘Gradation white’ shade designed specifically for blending.
- Brights and Darks: If you’re feeling adventurous, try bright or dark shades. Make sure they can blend well.
- Test Your Colors: Before you start, test the colors on a nail tip or paper. This ensures they work well together.
Select colors that reflect your style and occasion. With the right colors, your ombre nails will look professional and polished.
Step-by-Step Process for Creating Ombre Nails
Basecoat Application Tips
Start with a clean, prepped nail surface. Apply a thin basecoat layer to protect your nails. Ensure it’s evenly spread to avoid bumps or thick areas. Cure under your LED lamp according to the basecoat instructions.
Applying the First Coat of Color
Choose your first semi-opaque or translucent color. Apply a coat, covering two-thirds of each nail. Aim for a thin, even layer to set the stage for blending. Don’t cure it yet—wait until after blending.
Techniques for Blending and Gradients
For the blend, you need Art Clear Gel and your liner brush. Place a dollop of the gel at the smile line. With gentle movements, merge the clear gel into the color coat. The goal is a soft fade, erasing harsh lines.
Using a Tap Brush for Smoother Transitions
The tap brush is key for perfecting the gradient. Use soft, tapping motions to diffuse the color into the clear gel. Work vertically and keep a light touch. Repeat till you achieve a smooth transition. Clean the tap brush with alcohol if needed.
The Importance of Curing Between Coats
Once you’re happy with the blend, cure the nail under the LED lamp for 10 seconds. This sets the blended layer. After, apply a second thinner color coat. Cure again, but now for a full lamp cycle. Curing solidifies each layer, making your design last.
Tips for Achieving a Flawless Ombre Effect
To achieve a flawless ombre nail effect, follow these additional tips:
- Prime the Nails Properly: Start with clean, filed nails. Wipe each one with alcohol.
- Thin Layers: Apply very thin coats. Thick coats make it hard to blend colors smoothly.
- Patience with Blending: Take your time blending. Rushing can spoil the gradient look.
- Use the Right Colors: Semi-opaque colors work best. Avoid fully opaque ones for the ombre effect.
- Testing Colors First: Practicing on a tip helps. Check how colors fade together before starting.
- Avoid Overworking: Tap briefly with your brush. Too much tapping can lift off the polish.
- Correct Mistakes Quickly: Clean errors before curing. Use a clean brush dipped in alcohol.
By keeping these tips in mind, you can create beautiful, seamless ombre nails right at home.
Finishing Touches: Topcoat Application
Applying a topcoat is the final step for ombre nails. Choose a thick, glossy topcoat for a smooth finish. It also fills in any tiny creases and gives your nails a shiny look. Use a topcoat like Kokoist’s Ultra Glossy or Leafgel’s Glossy Topcoat. These work well with ombre because they are thick and cover well. Don’t use a non-wipe topcoat. Thin topcoats show imperfections and don’t give the same smoothness. Apply the topcoat evenly over the entire nail. Be careful to cover the gradient area well. This helps blend everything together. Once you have applied the topcoat, cure it under your LED lamp. Different topcoats have different cure times. Check the instructions on your topcoat for the right time. After curing, your ombre nails are complete. With a quality topcoat, your ombre nails should last longer and keep their beautiful gradient design.
DIY Challenges and Solutions
When you decide to dabble in DIY “how to ombre nails”, you might face issues.
Here are common challenges and solutions:
Difficulty Blending Colors
A common issue is not getting colors to blend smoothly. To combat this, remember:
- Start with similar tones.
- Use a very light touch.
- Blend colors when they’re still wet.
- Practice makes perfect.
Managing Gel Polish
Gel polish can be tricky. It may not cure properly or might spread. Here’s how to deal:
- Apply thin layers.
- Cure under an LED lamp.
- Keep lint-free wipes and alcohol nearby for quick cleanups.
Achieving Consistent Results
Sometimes nails don’t look the same. Achieve consistency by:
- Following a strict step-by-step approach.
- Using quality tools that make precision easy.
- Applying the same pressure and technique on each nail.
Working with Non-Dominant Hand
Working on your non-dominant hand can be a struggle. Here’s what can help:
- Take extra time and care.
- Rest your hand on a stable surface.
- Consider simpler designs for practice.
Facing DIY troubles can be a challenge, but with patience and these solutions, mastering ombre nails at home will be within reach.

Maintenance and Upkeep for Long-Lasting Ombre Nails
To keep your ombre nails looking fresh, follow these maintenance tips. Good care extends the life of your manicure and keeps the ombre effect vibrant.
- Regular Touch-Ups: Inspect your nails regularly for any chips or wear. Apply a thin layer of topcoat to the affected area and cure under the LED lamp. This prevents peeling and maintains shine.
- Moisturize: Keep your hands and cuticles well-moisturized. Dry cuticles can cause lifting and peeling of your gel polish. Use cuticle oil daily to keep the skin around your nails soft.
- Gentle Use: Be kind to your nails. Avoid using them as tools to pry things open. Wear gloves while doing tasks that could damage your nails, like cleaning with harsh chemicals.
- Sunlight Exposure: Prolonged exposure to sunlight may cause discoloration. Protect your nails by applying sunscreen or wearing gloves when outdoors for long periods.
- Removal: When it’s time to remove your ombre nails, do it gently. Use a nail file to break the seal of the topcoat. Soak the nails in acetone to lift the gel polish without harming your nails.
- Breaks Between Applications: Give your nails a break between applications. This allows them to breathe and recover from any stress caused by the gel polish.
By following these simple yet effective steps for maintenance and upkeep, you can ensure your ombre nails stay perfect for longer and your nails remain healthy. Remember, preserving the beauty of your manicure is as important as the initial application.

